|
|
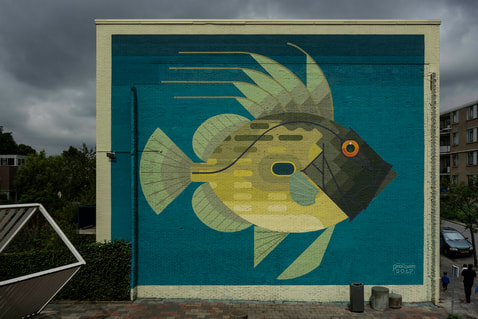
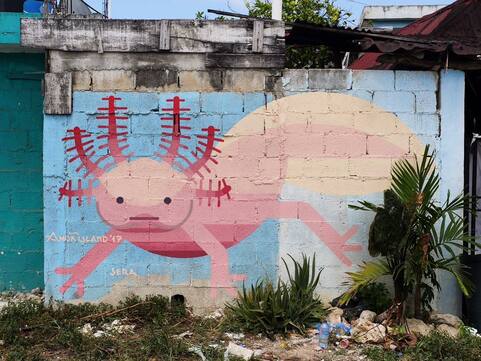
Amok Island does street art mostly in Australia, but you can find his art only in 25 couturiers worldwide. Amok is from the Amsterdam but now lives in Western Australia. He works on a lots of his work represents the real items, he draws for people to identified what he draws. "His lifelong fascination with nature and her relationships and history with mankind drive the artist’s obvious appreciation and obsession with his subjects and his urge to direct the attention of his audience to them." Amok draws lots of things from nature and balances his art work with simply geometrical shapes and use only colors around the color palette. Amok has exhibits in Australia, Netherlands, and Japan.
Amok is a very inspiring artist that draws simply, but has enough there so people can tell what the drawings are. He draws real things he find in nature and paints them to bring conversations in his drawing. He shows how you create things that can be simple but has enough to where you can understand what he paints. He uses colors from the same color pallet that make the colors not contract against each other. The placement he does on his art work and on the buildings make it seem it naturally belong on the building. What makes me really like this art is from the realistic part of the item, but doesn't have every single detail on the painting making the painting over crowds and overwhelms the art work.
Website--https://www.amokisland.com/
|
|
|
Pros and Cons--
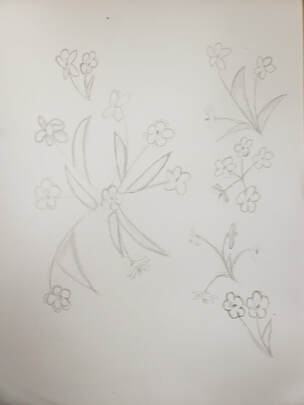
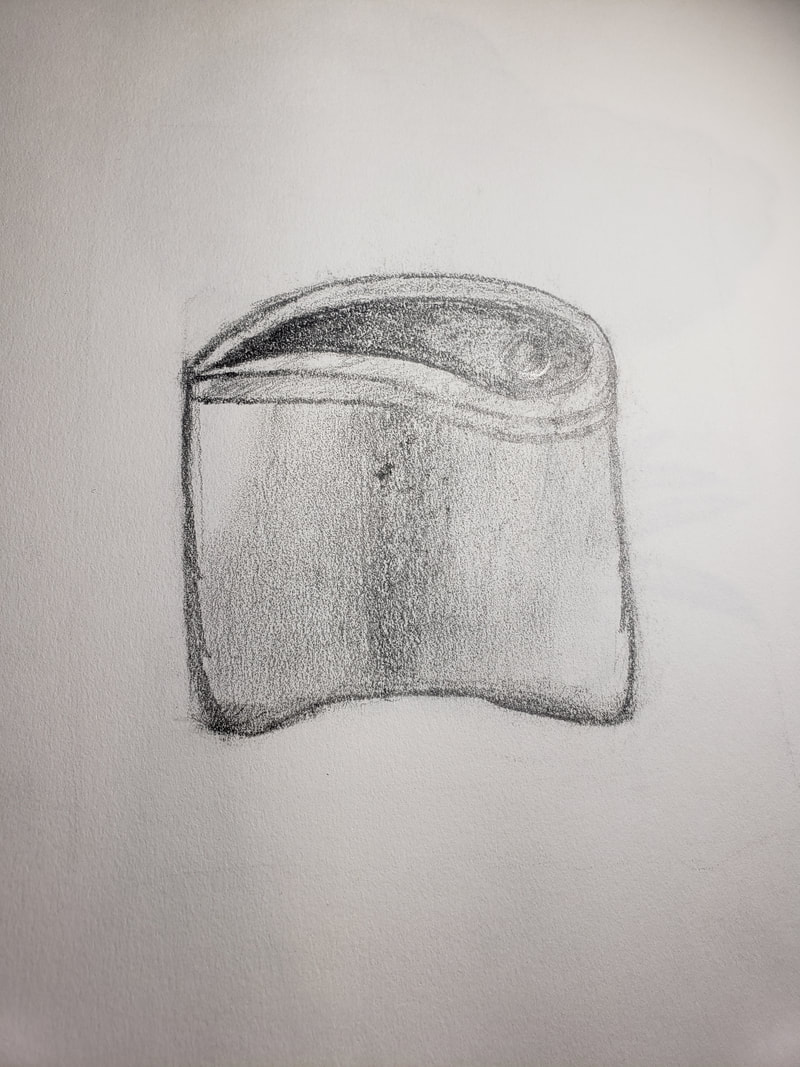
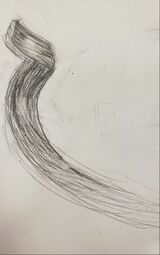
Flower Pencil- The Pros of the pencil drawing is that there is not a lot going on. The piece is not over crowed with many details in the picture. Some of the Cons on the pencil drawing is that there needs to be more value to tell the different from the darker parts of the flower from the lighter parts of the flower. Another con for the pencil piece is that the leaves on the flowers are that the leaves come out all over the place and don't move naturally they just go all over the place.
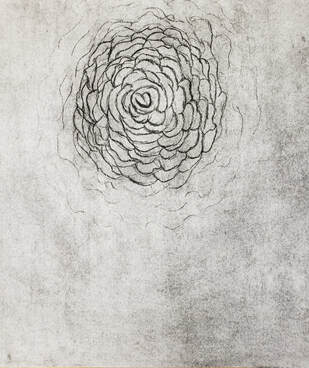
Charcoal Rose- The Pros on the Charcoal rose are you can tell where the rose are and so the lines are darker they make the rose stand out. Another pro for the rose is that how it fades from the darker center to the lightest edge. The Cons to the rose is there're is not a lot of value to the rose. There's only one shade to the rose instead of the rose having highlights from a light source and having shadows.
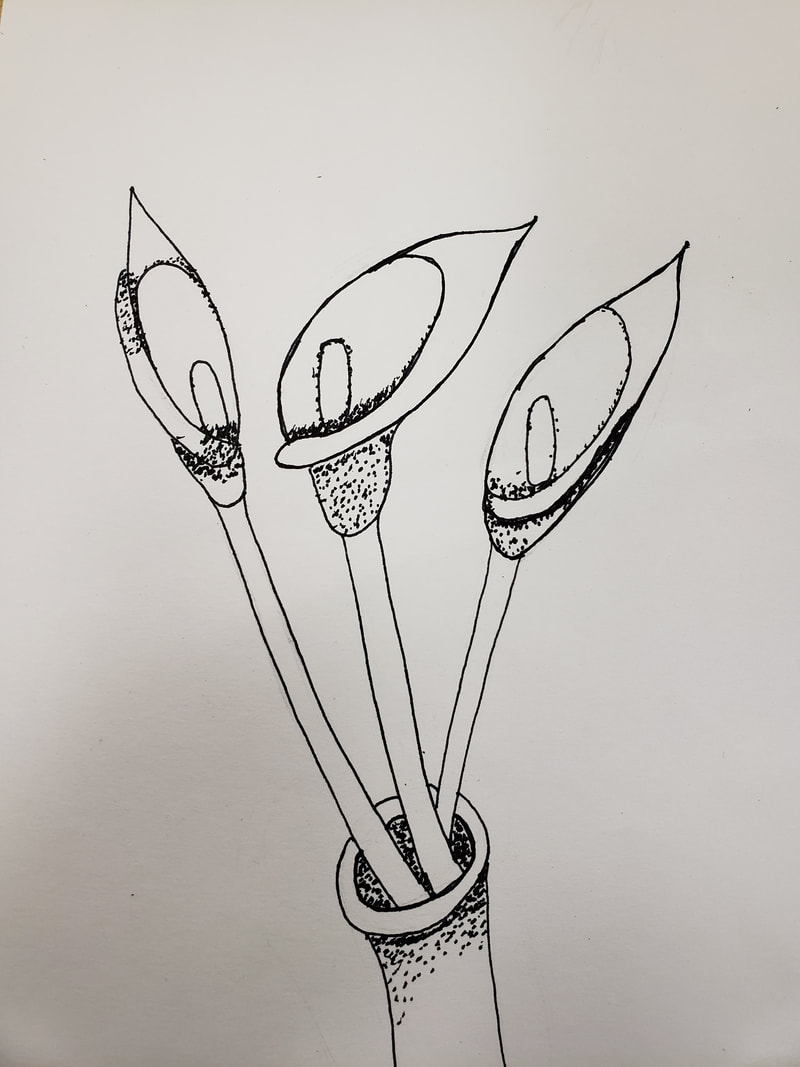
Flower Pen-- The Pros to the Pen flower is that there is a lot of value to the flowers to differentiate form the darker part of the flower to the lighter parts of the flower. Another pro is that the stippling on the flower is close together or farther apart to show the value. Some of the Cons are that there should have being some cross-hatching to show more shadows to give contracts to the piece . There could have also could have been more line work done on the vase to make it not as flat at the bottom.
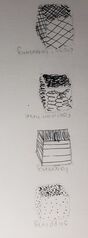
Vocab-
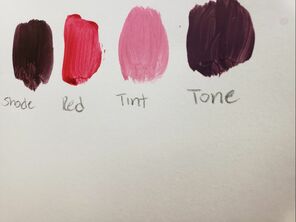
VALUE- Elements of design to show the different between the lighter and darker parts of a piece.
Composition- The arrangement of a piece of visual elements to show the principles of the art.
Composition- The arrangement of a piece of visual elements to show the principles of the art.
Warm-Ups-
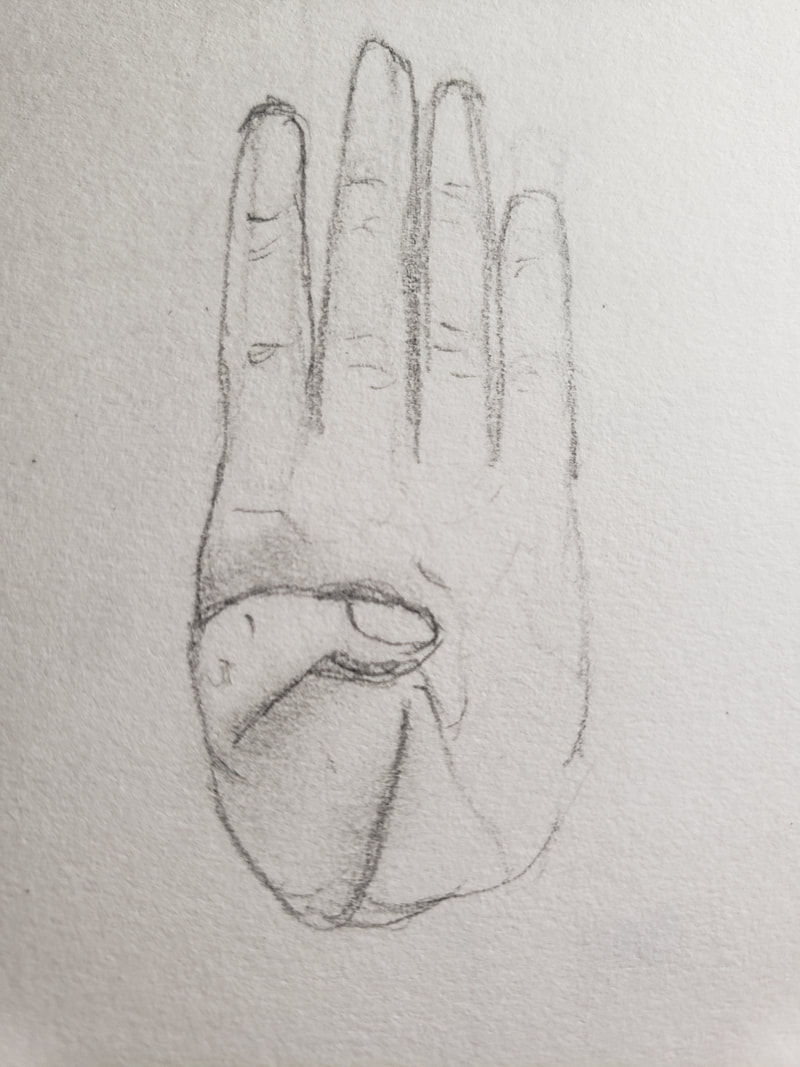
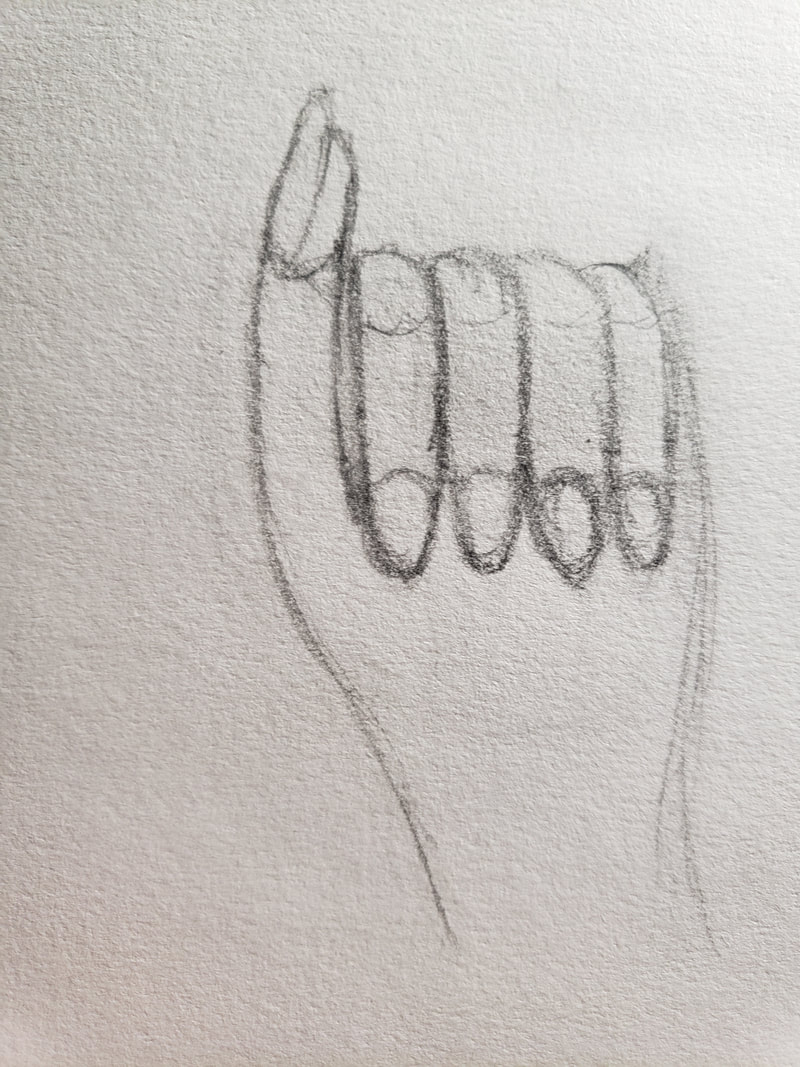
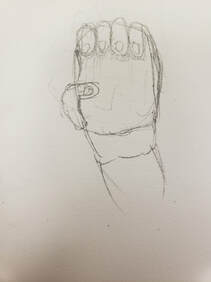
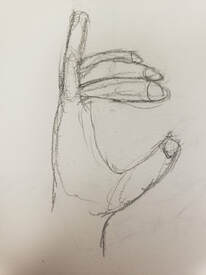
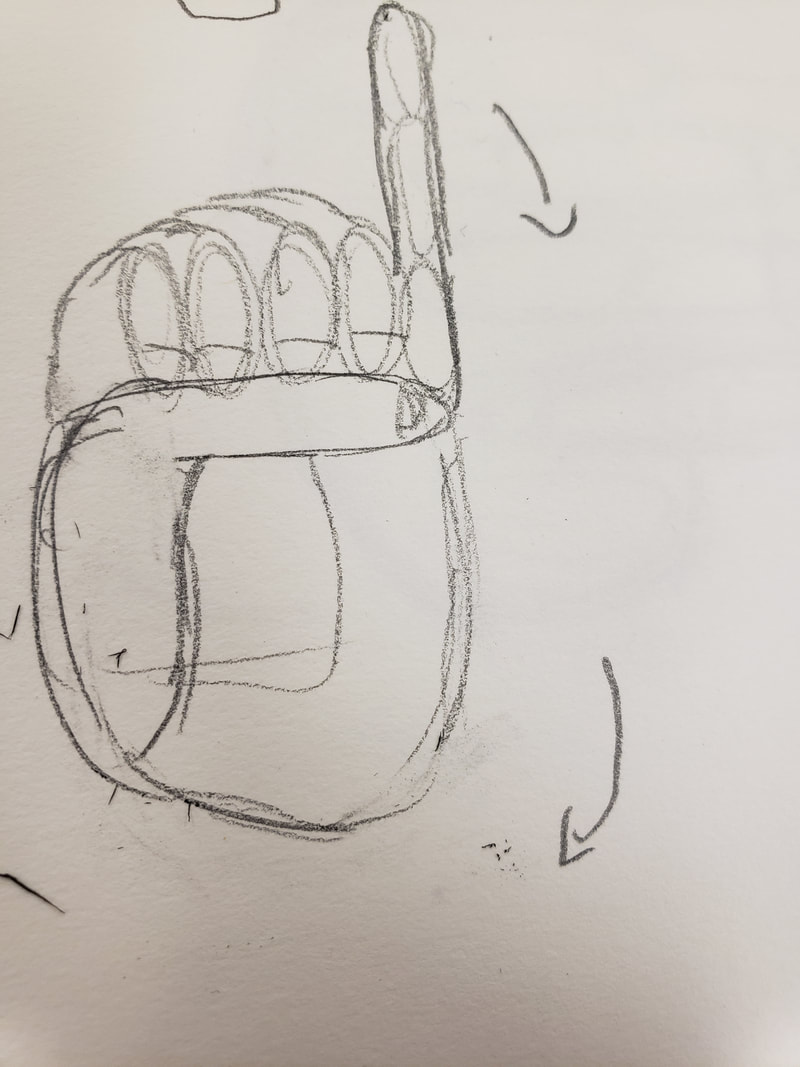
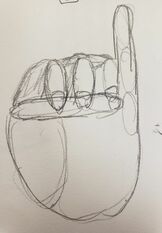
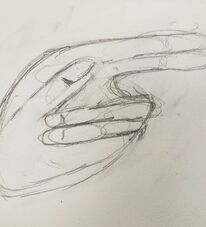
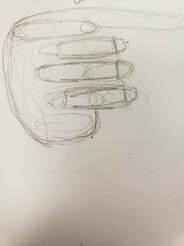
One of the most helpful warm-ups would be the Blind drawing and the hand drawings. The blind drawing was very helpful cause it makes you think about what you draw and the shapes you have to use so you can draw the picture as actuator as you can without looking or lifting your pen. The hand A and B help you learn how to draw hands and makes you think of the shapes that make up a hand. When you think about what makes up a hand you get a hand that's close to an actual hand.
|
|

|
|
|
|
|
|
|
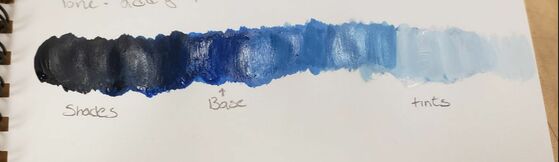
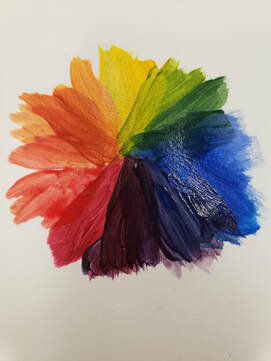
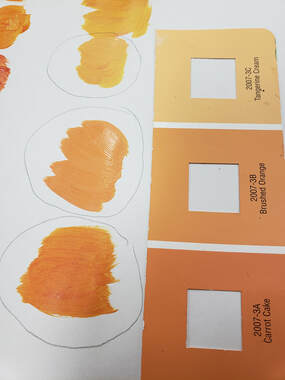
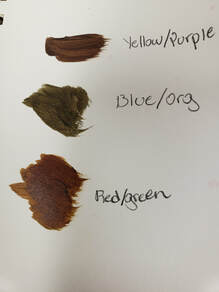
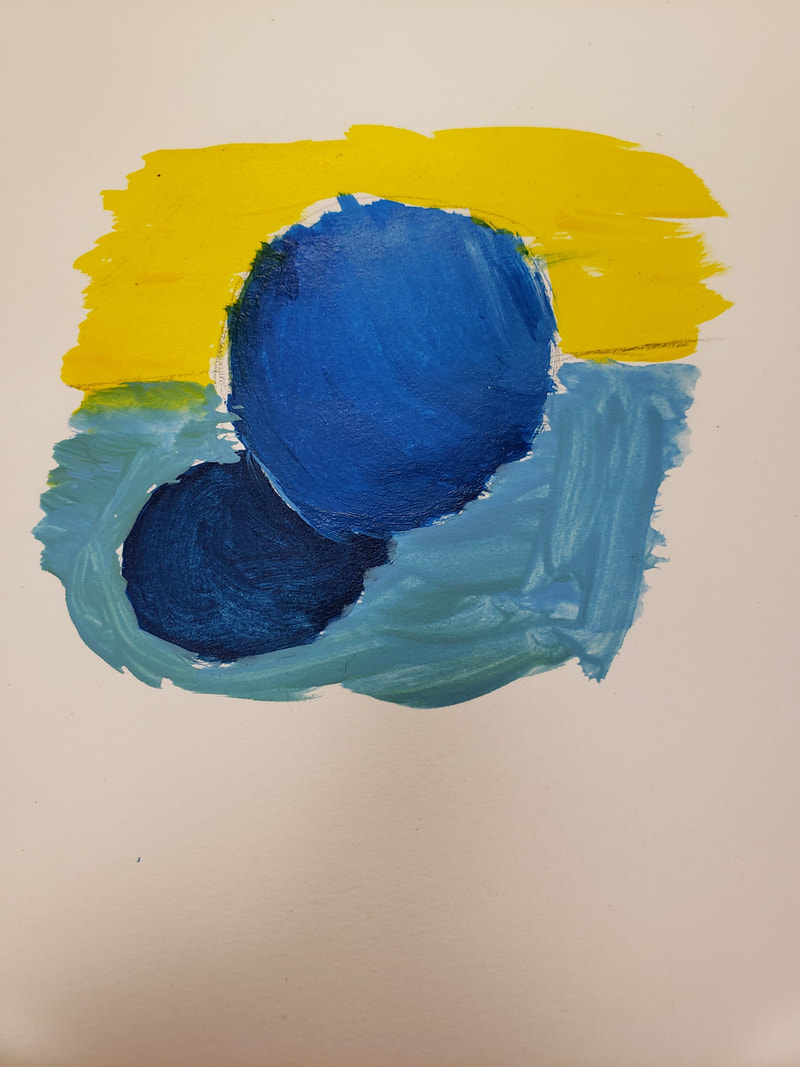
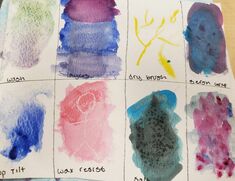
The things I learned the most from this activity was how to blend paints colors together to get other colors and how to make the color darker or lighter. I feel like the shade to tint painting will be help the most cause you can get the same color and create darker and lighter areas with the piece. I learned the most from the texture piece cause it showed how to create texture in a piece. You can make browns by mixing red and green, blue and orange, and yellow and purple together. You can tone down a color by adding gray to the color.
|
|
|
|
|
|
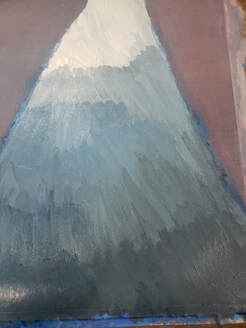
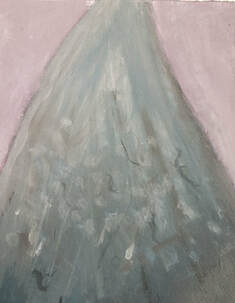
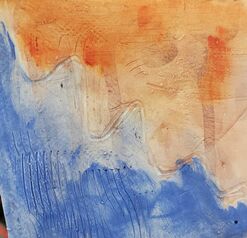
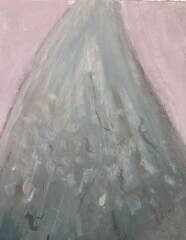
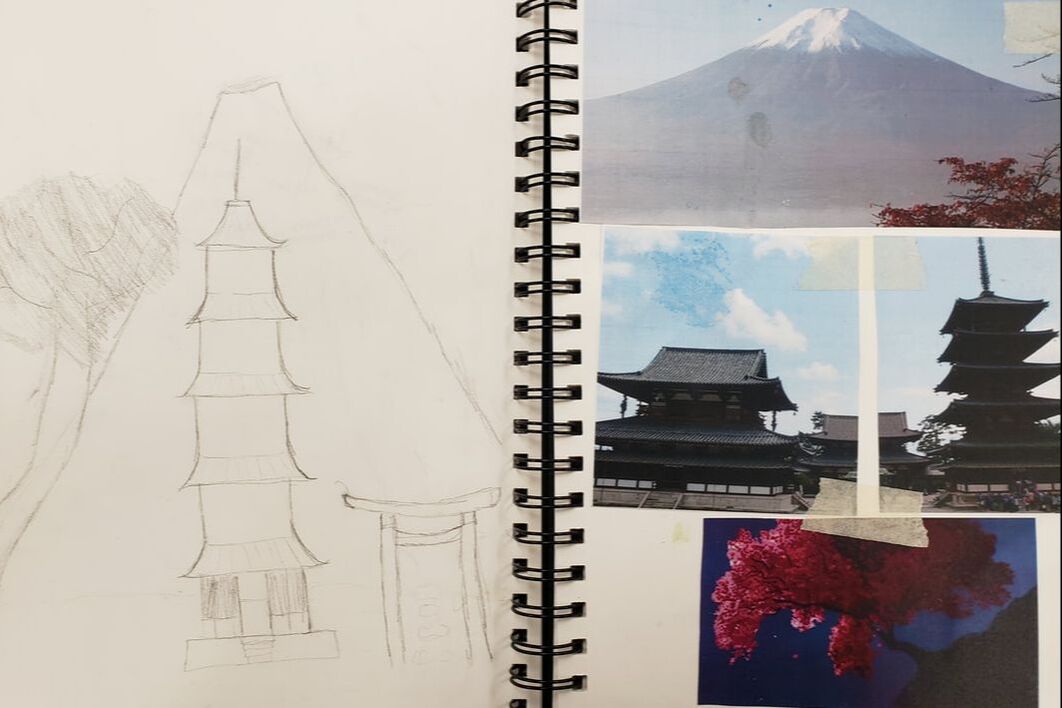
The mountain represents Mount Fuji in Japan. This place is important to me because it is in Japan and I've always wanted to go to Japan. The thing I found most challenging about this was painting without having the paint start creaking. I think this piece was most successful in the texture in the mountain. The process that took the mountain was doing different shades of a gray blue then blending it together. The next thing I did was add texture to the mountain.
|

|

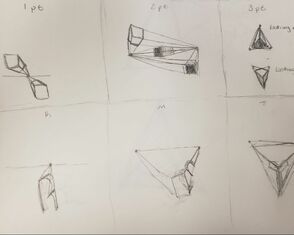
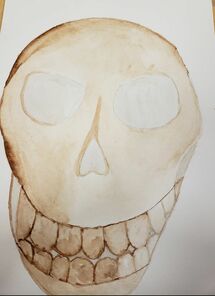
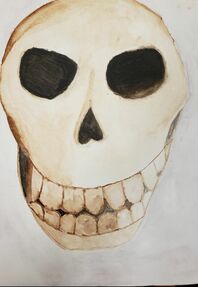
For my skull I used 3 point perspective. I found the skull in my house and took a picture of it for the watercolor project. The thing I found most difficult was the black shading between the teeth. The two warms up that helped me out the most were the watercolor techniques and the landscape. The watercolor technique helped me with different techniques to use to make the skull better and how to get different types of styles in the piece. The landscape helped me out with blending colors together to get smooth transitions between the shadows and highlights.
|
|
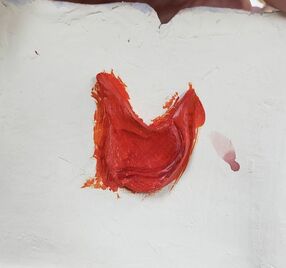
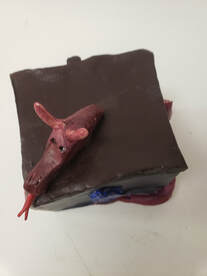
I plan to finish my piece by darkening the colors and glue the dragon to the piece. One of the most difficult things about the piece is painting the dragon without getting paint on the box. I think the dragon is the most successful part of the piece.
Slab: Shaping clay into a flat thick piece.
Scratch and slip: Scratching the clay then adding water to the clay to attach two pieces of clay together.
Greenware: Unfired clay.
Bisque: Clay that has gone through the first fire.
Fire: Heating the clay to a temperature that makes the clay hard.
Slab: Shaping clay into a flat thick piece.
Scratch and slip: Scratching the clay then adding water to the clay to attach two pieces of clay together.
Greenware: Unfired clay.
Bisque: Clay that has gone through the first fire.
Fire: Heating the clay to a temperature that makes the clay hard.
|
|
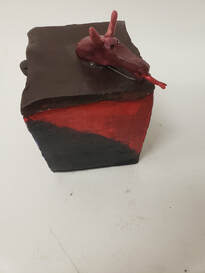
I fished painting the sides and dragon and glued everything that came detached. I also made colors even and smother on the piece. Things that went successful about the piece was the painting because everything went smoothly on the clay. One thing I would change would be making the lid match the bottom piece more evenly.

|
|
|
|
|
|
|
|
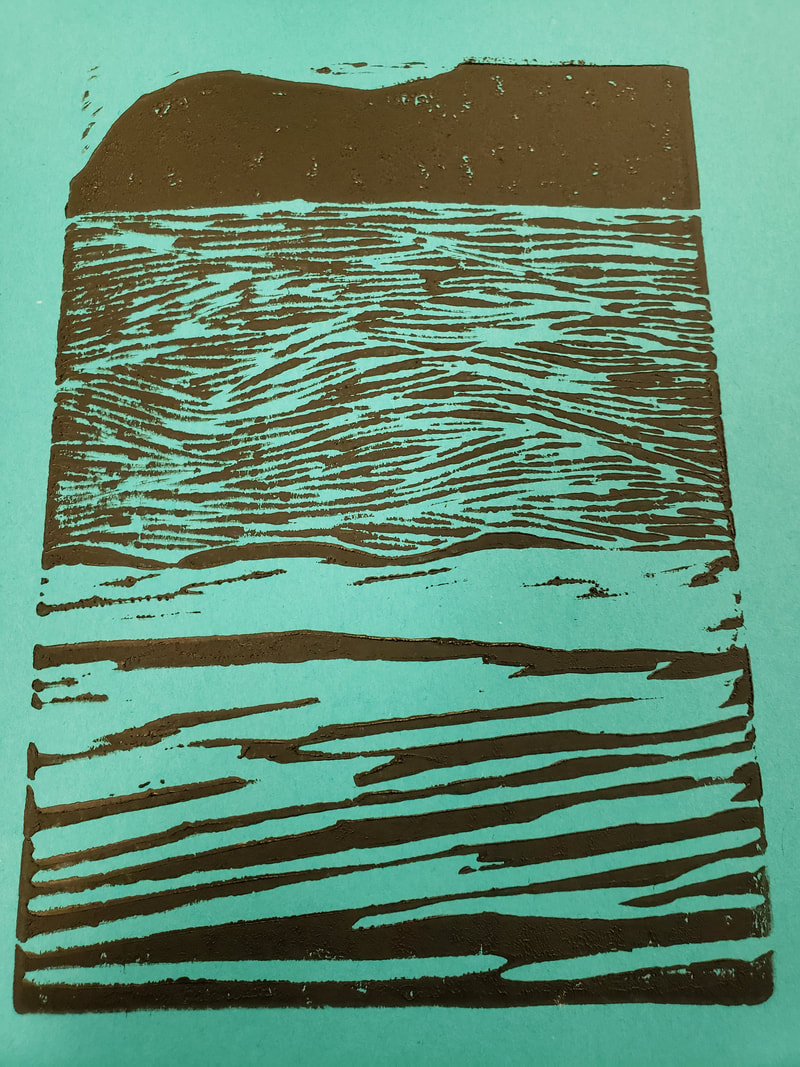
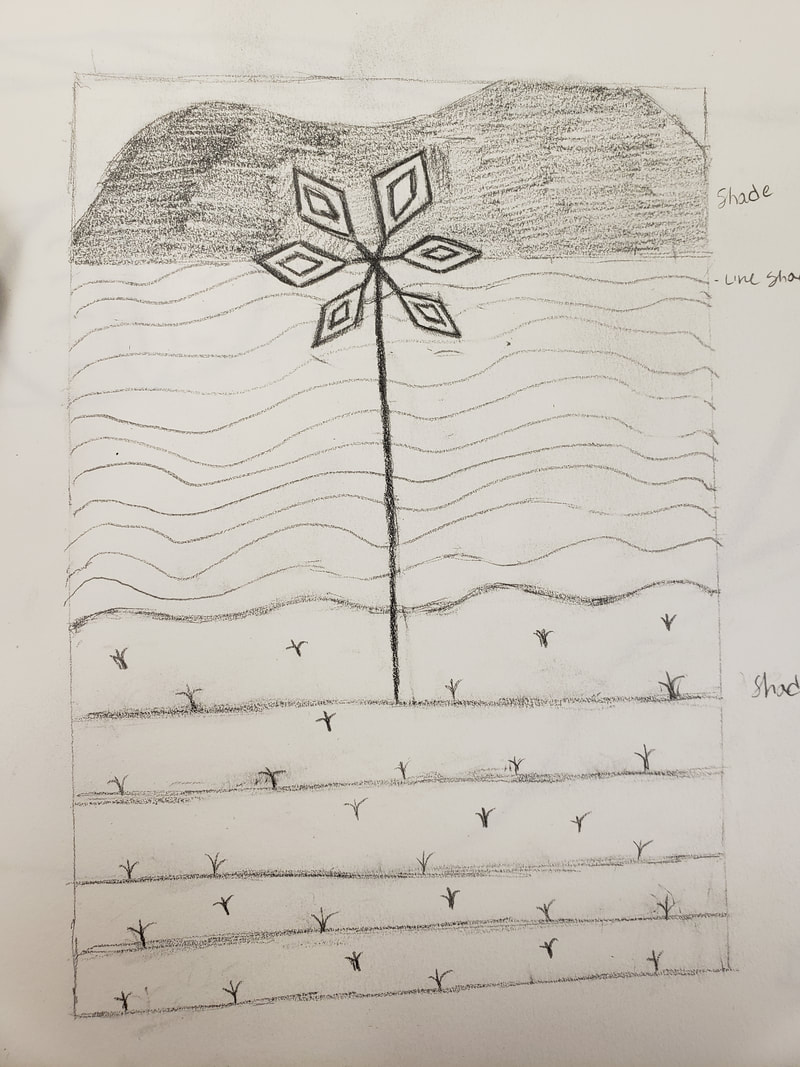
My block shows the line theme by how the lines look different for the water mountain and the sand.
My block was good in the land and water. I would make the gape smaller between the land and water. I would also make the mountains rounder so they don't look like clouds.
My block was good in the land and water. I would make the gape smaller between the land and water. I would also make the mountains rounder so they don't look like clouds.
|
|
|
|
|
|
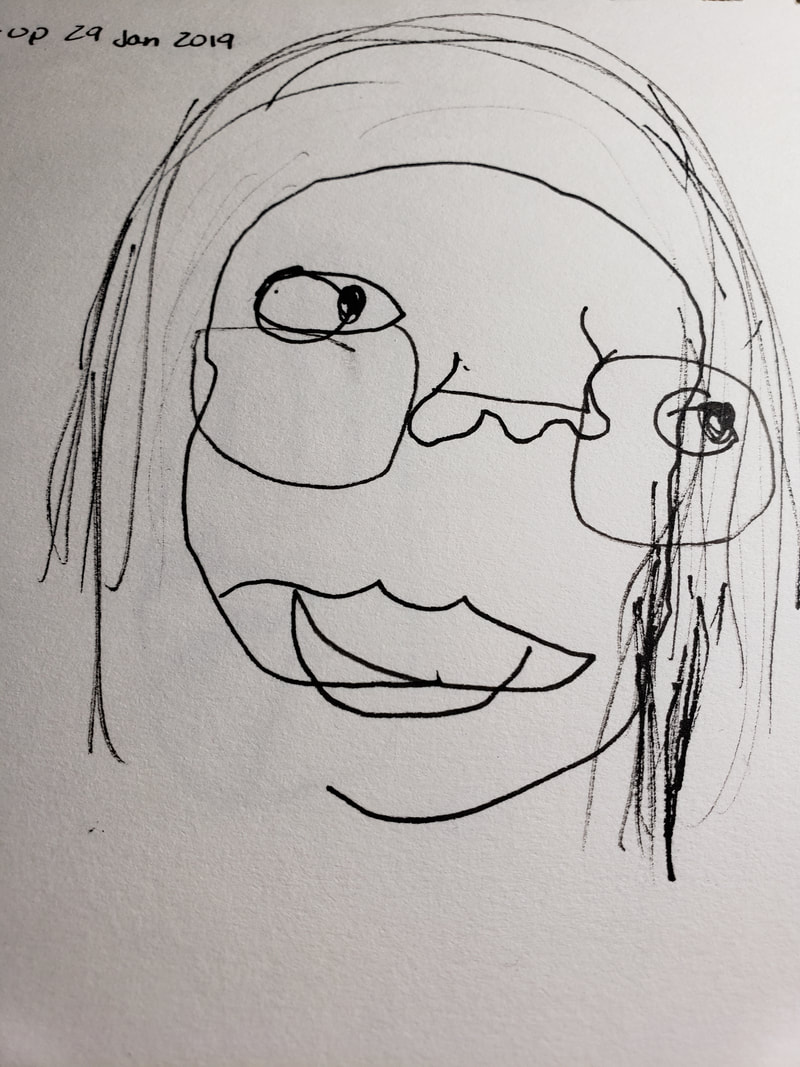
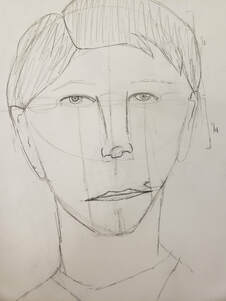
The most helpful warm up is the face proportions because it shows where everything is on the face. It also shows how everything on the face lines up on the face. One of the most surprising this is how big the nose is and how is and how it the size of the space in between the eyes.
|
|
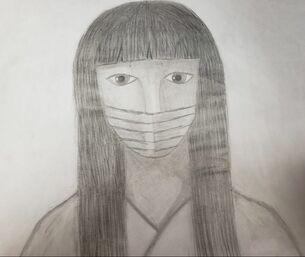
This portrait is based of someone I use to know. I used pencil as medium. When I first started I made to head, then the mask, next I did the eyes, nose and hair. After that I did the shoulders. When everything was drawn I added shadows. What was good about that piece was how it was portion right and everything was in the right place on the face. One thing I might have change or made better would be the eyes so they look more alike.

|

|
The mediums I used were pencil, watercolor, watercolor pencil, pen, burned paper, and acrylic paint.
I used black, blue, and red acrylic paint on top of the tissue paper. Then I drew the person, eyes, and face on separate paper and cut them out. On the eyes I out lined it with pen and glued the papers on top of the paint. I then painted the flower with acrylic paint on separate paper and glued in the middle of paint. Then I cut strips of paper and colored them with water color pencils the glued the strips together and put them both on each side of the board. Next I burned the thoughts paper and placed it on the person. Then I burned the sides of the board. I used water color to make it looked like everything was burned a lot and then used dark water color and let it run up and down the board to make the dark colors bleed on the colors and cover them.
The way I portrayed, thoughts, was showing someones thoughts and how it can be a mess, but not all there thoughts are dark and mess. I showed that there thoughts of everything bleeds into everything they think and do.
|
|
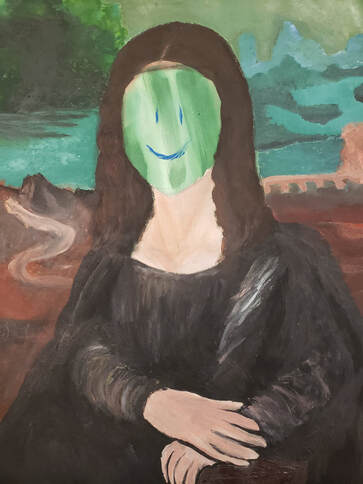
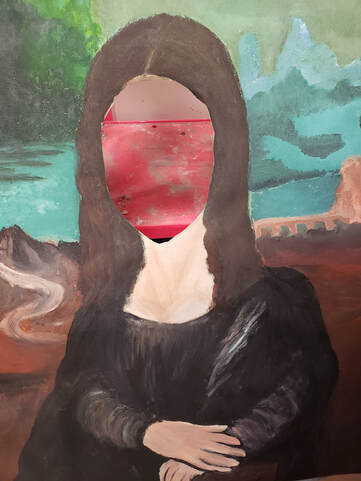
Some of the pros to the Mona Lisa was I think the background was really good and blended out really well. It shows everything in the original piece. Some of the cons are how the head is bigger the the body and the background doesn't match the color of the original some. The process for making the Mona Lisa was we did the outline of the body then did the left side of the background while painting the Mona Lisa and then we did the right side of the background. At the end we went over the Mona Lisa and fix the outline to make it look like the Mona Lisa is on top of the background.
|
|
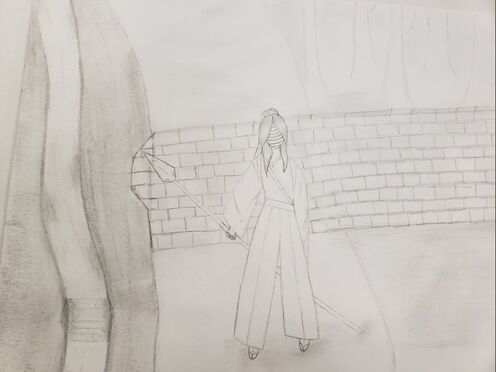
Some of the pros on the left piece are the character is good and the details are on the the person is very good. Some of the cons for the piece are the trees could have more details and not just be outlines. I made the outline of the character then transfers the person to drawing paper and added more detail to them. I made the left side of the background and then made the trees and after that I made the wall. And finally I cut the edges of the paper to get rid of the emptiness.
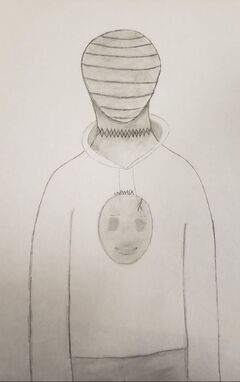
Some of the pros to the right piece are the mask and neck for there shadows and darkness. Some cons are the pants could had more detail and not look like a last thought. On the right I made the outline of the character then transferred it to drawing paper and made his body longer. I then added the shading around the mask and neck to made shadows on the face. Next I made the mask on the hoodie and made the lines on the outfit bolder and darker.
Some of the pros to the right piece are the mask and neck for there shadows and darkness. Some cons are the pants could had more detail and not look like a last thought. On the right I made the outline of the character then transferred it to drawing paper and made his body longer. I then added the shading around the mask and neck to made shadows on the face. Next I made the mask on the hoodie and made the lines on the outfit bolder and darker.
Final Exam
Question 1--
Describe the art work- List what you see in the artwork and what they used to make the art work.
Analyze the artwork- Look at the texture and medium, colors, and line work. Look at the shading and light source.
Interpret the artwork- How does it make you feel, what story is being told and how is it being communicated.
Judge the artwork- What's good about it and what need improvements.
Question 2--
From trying to figure out what to do for acrylic I would have used more reference of more mountains so it didn't look like a triangle with no top. I would also make sure I paint on the right side of the paper so the paint doesn't crack and make you restart. I would also make it use the theme more of the idea of place and make something more based off of a picture so you can tell what the picture is going on and tell what it is. For when painting the picture I started in the background but I would have changed the background to a different color so the piece isn't just darker colors. I would use a blue since the mountain is in front of the sky. For the mountains I would make the shape of the of the mountain less curved and show the top of the mountain so I can have the mountain white and the mountain not as many random colors and lines inside the mountain. I would add more texture in the mountain and not as straight. I would also add more shadows on the side so I could make the piece have more depth and not so flat. When I made the top I would have made it white and added a light gray to add shadows and when making the mountain I would not add much to the background so the mountain stood out more.
From trying to figure out what to do for acrylic I would have used more reference of more mountains so it didn't look like a triangle with no top. I would also make sure I paint on the right side of the paper so the paint doesn't crack and make you restart. I would also make it use the theme more of the idea of place and make something more based off of a picture so you can tell what the picture is going on and tell what it is. For when painting the picture I started in the background but I would have changed the background to a different color so the piece isn't just darker colors. I would use a blue since the mountain is in front of the sky. For the mountains I would make the shape of the of the mountain less curved and show the top of the mountain so I can have the mountain white and the mountain not as many random colors and lines inside the mountain. I would add more texture in the mountain and not as straight. I would also add more shadows on the side so I could make the piece have more depth and not so flat. When I made the top I would have made it white and added a light gray to add shadows and when making the mountain I would not add much to the background so the mountain stood out more.
|
|
Question 18 (Medium)-- The medium I use the most and like the most is pencil. I like pencil because it is something I have the most control of and can get really good shadows on. One medium I would have use would be colored pencil to explore more with color and it is a lot like pencil, but you could get more color into it and make it the piece have even more depth.
|
|
|
Question 8 (Warm-up)-- The most helpful warm up was the shading warm-ups, because it showed how to make one place on the piece have a light source and how to add shadows based of the light source. It shows the the shadows the most and how to make things more in depth and give things more of a 3D look and shape.
|
|
Question 3 (Coping)-- Coping is plagiarism when you copy their whole piece. Coping is not plagiarism when you use many different reference pictures to make your own art work. When you make your own art work you can't copy the whole thing from many pictures, but you take little things from each picture to create a whole new piece that is your own.
|
